post epley maneuver instructions
Understanding Benign Paroxysmal Positional Vertigo (BPPV)
Following the Epley maneuver, patients often experience temporary dizziness or nausea; remaining still for several hours is crucial for optimal results.
Avoid bending over, lying flat, or quick head movements for at least 24-48 hours to prevent dislodged crystals from returning to the posterior canal.
What is BPPV?
Benign Paroxysmal Positional Vertigo (BPPV) is a disorder of the inner ear causing brief episodes of vertigo – a sensation of spinning. It’s the most common cause of vertigo, stemming from dislodged calcium carbonate crystals (otoconia) within the semicircular canals. These canals, filled with fluid, signal head movements to the brain.
When otoconia break free from the utricle, they can migrate into the semicircular canals, particularly the posterior canal. This incorrect signaling leads to false sensations of movement when changing head positions. BPPV isn’t considered serious, but can significantly impact daily life.
Post-Epley maneuver, expect potential temporary dizziness or nausea. Strict adherence to post-maneuver instructions – avoiding bending, lying flat, and rapid head movements for 24-48 hours – is vital. This minimizes the chance of otoconia resettling and triggering symptoms. Hydration and rest are also recommended during this recovery period.
Causes of Posterior Canal BPPV
Posterior canal BPPV typically arises from otoconia – tiny calcium crystals – dislodging from the utricle, a sensory organ in the inner ear responsible for detecting gravity and linear acceleration. This detachment can occur spontaneously with age, head trauma, or even prolonged bed rest. Sometimes, no specific cause is identifiable.
As these crystals migrate into the posterior semicircular canal, they disrupt normal fluid movement, sending incorrect signals to the brain about head position. This mismatch triggers the sensation of vertigo with specific head movements.
Following the Epley maneuver, patients should avoid activities that could dislodge the repositioned crystals. This includes refraining from bending over, lying flat, turning the head excessively, or strenuous physical activity for at least 24-48 hours. Maintaining adequate hydration and getting sufficient rest are also crucial for a successful outcome.
Symptoms of BPPV
The hallmark symptom of BPPV is brief episodes of vertigo – a spinning sensation – triggered by specific changes in head position. These movements often include rolling over in bed, looking up, or bending down. Nausea and imbalance frequently accompany the vertigo, but vomiting and hearing loss are uncommon.
The duration of these episodes is typically short, lasting less than a minute, and symptoms tend to subside with habituation. However, the unpredictable nature of the attacks can significantly impact daily life.
Post-Epley maneuver, some residual dizziness is expected. Patients should avoid positions that previously provoked symptoms for at least 24-48 hours. This includes sleeping with the affected ear up, avoiding quick head movements, and refraining from strenuous activities. Staying hydrated and resting can aid recovery, and any worsening symptoms should be reported to a healthcare professional.

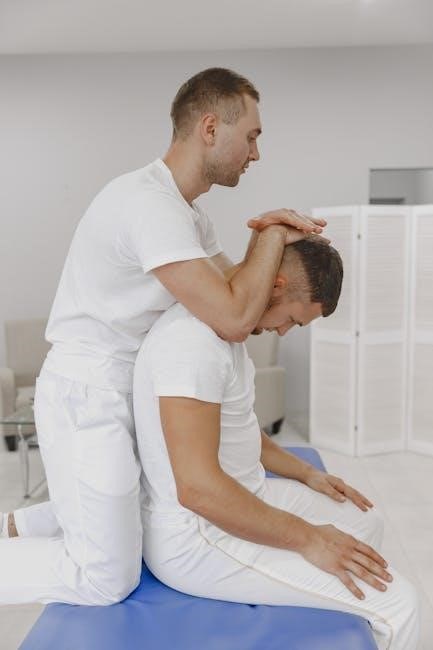
The Epley Maneuver: A Comprehensive Guide
After the Epley maneuver, patients should avoid head movements and lying flat for 24-48 hours to allow crystals to settle, minimizing symptom recurrence.
What is the Epley Maneuver?
The Epley maneuver is a series of specific head and body movements designed to treat Benign Paroxysmal Positional Vertigo (BPPV), specifically when caused by crystals (otoconia) dislodged within the posterior semicircular canal of the inner ear. It’s a repositioning technique aiming to move these crystals out of the canal and back into the utricle, where they belong, thereby alleviating the vertigo symptoms.
Essentially, the maneuver utilizes gravity to relocate the otoconia. It involves quickly moving the patient through a sequence of positions – starting with the head turned and tilted, then rapidly shifting to a hanging position, rotating to the opposite side, and finally sitting upright. This process is often repeated several times during a single treatment session.
While generally safe when performed correctly, it’s crucial to understand that the Epley maneuver isn’t a cure-all and may require multiple sessions for complete resolution. Following the maneuver, specific post-procedure instructions are vital for maximizing its effectiveness and preventing symptom recurrence.
Indications for Performing the Epley Maneuver
The Epley maneuver is primarily indicated for patients diagnosed with posterior canal BPPV, confirmed through diagnostic testing like the Dix-Hallpike test, which elicits vertigo and nystagmus with specific head positioning. A clear correlation between specific head movements and the onset of vertigo is a key indicator.
Patients experiencing episodic vertigo triggered by changes in head position – such as rolling over in bed, looking up, or bending down – are strong candidates. The maneuver is most effective when the BPPV is localized to one side; bilateral BPPV requires separate treatment sessions for each ear.
However, careful consideration is needed. Post-maneuver instructions are crucial for success. Patients must understand restrictions like avoiding lying flat, bending, or quick head movements for 24-48 hours. Adherence significantly impacts the likelihood of crystal repositioning remaining stable and preventing symptom return.
Contraindications to the Epley Maneuver
While generally safe, the Epley maneuver isn’t suitable for all patients. Significant cervical spine issues, like instability or severe arthritis, are absolute contraindications due to the required head and neck movements. Similarly, patients with vertebral artery dissection or stenosis should not undergo the procedure, as it could potentially compromise blood flow.
Severe cardiovascular disease, including uncontrolled hypertension or recent stroke, warrants caution and physician discretion. Individuals with retinal detachment, particularly if recent, require careful evaluation before attempting the maneuver.
Post-maneuver, patients must be informed about potential, though rare, complications like temporary nausea or dizziness. Strict adherence to post-procedure instructions – avoiding bending, lying flat, and rapid head movements for 24-48 hours – is vital to minimize the risk of dislodged crystals causing recurrent symptoms. Any worsening symptoms necessitate immediate medical attention.

Step-by-Step Instructions for the Epley Maneuver
After completing the maneuver, patients should remain still for several hours, avoiding bending or lying flat to allow crystals to settle effectively.
Preparation for the Epley Maneuver
Prior to initiating the Epley maneuver, thorough patient education is paramount. Explain the procedure, potential sensations (dizziness, nausea), and the importance of adherence to post-maneuver instructions. Ensure the patient understands they may experience temporary worsening of symptoms during the process, which is a normal response as the otoconia reposition.
The environment should be prepared for safety; a cushioned surface is ideal, and assistance from a healthcare professional is crucial. Confirm the affected side by performing the Dix-Hallpike test. Inform the patient to keep their eyes open throughout the maneuver, focusing on a fixed point, to help manage any nystagmus.
Advise the patient to avoid sudden movements immediately following the procedure and to adhere strictly to the restrictions outlined for the subsequent 24-48 hours, including avoiding bending over, lying flat, and rapid head motions. This minimizes the risk of dislodged crystals returning to the posterior canal, potentially negating the maneuver’s effect.
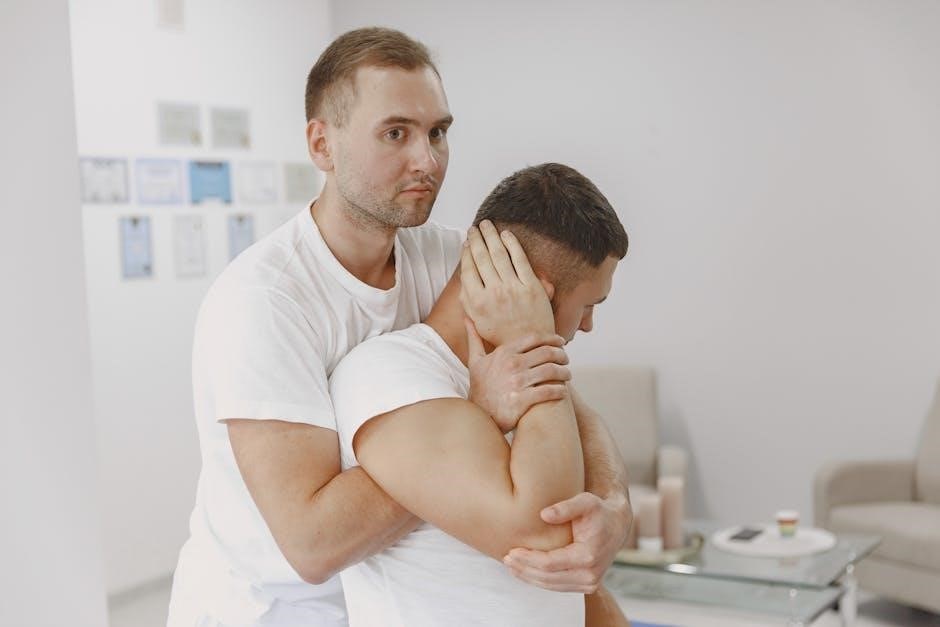
Step 1: Initial Positioning (Dix-Hallpike Test Position)
Begin with the patient seated on the edge of an examination table. Instruct them to turn their head approximately 45 degrees towards the suspected affected side. Quickly, but gently, guide the patient into a supine position, simultaneously extending their neck approximately 30 degrees, looking upwards. The goal is to position the affected ear downwards.
Maintain this position for at least 30 seconds, closely observing for any nystagmus – involuntary eye movements – which indicates the presence of BPPV. If nystagmus is observed, it confirms the diagnosis and identifies the affected side.
Throughout this step, reassure the patient and instruct them to keep their eyes open and focused on a fixed point. This initial positioning mimics the Dix-Hallpike test, provoking the symptoms and preparing for the subsequent repositioning maneuvers. Post-maneuver instructions should be briefly reiterated, emphasizing the need for stillness.
Step 2: Turning the Head 90 Degrees
While maintaining the extended neck position, swiftly rotate the patient’s head 90 degrees towards the unaffected side. This movement aims to reposition the otoconia (calcium carbonate crystals) within the posterior semicircular canal. Continue holding this position for another 30 seconds, diligently monitoring for any changes in nystagmus.
A change or cessation of nystagmus during this phase suggests that the crystals are beginning to move out of the canal. Patient comfort is paramount; explain the head turn beforehand to minimize anxiety.
Briefly remind the patient about the post-maneuver restrictions – avoiding head movements and lying flat – to maximize the effectiveness of the procedure. This step is crucial for dislodging the crystals and initiating their migration towards the utricle, where they are less likely to cause vertigo.
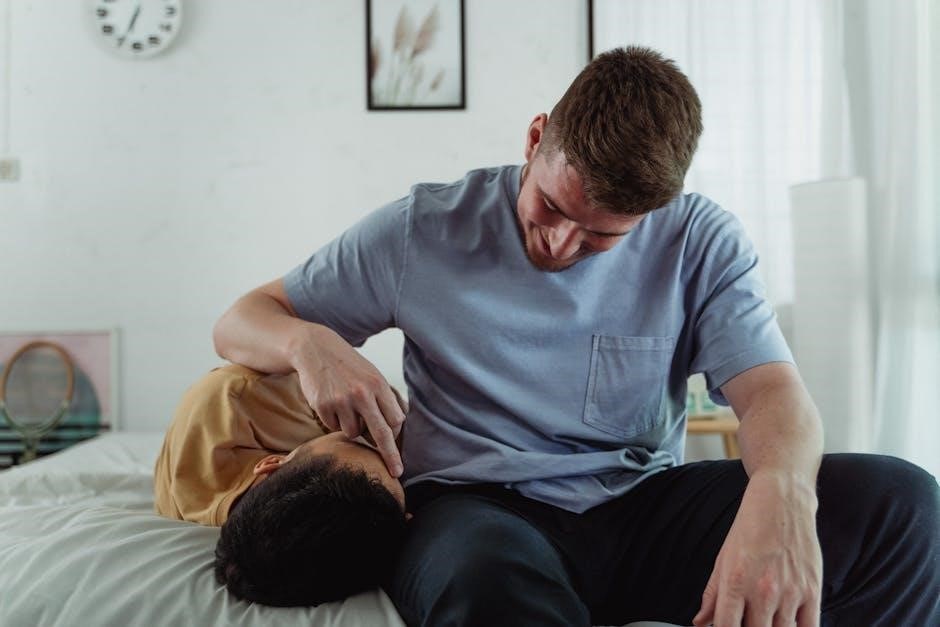
Step 3: Rapidly Moving to Hanging Position
With the head turned 90 degrees, quickly and smoothly guide the patient into a full “hanging” position. This involves lowering them so their shoulders are approximately level with the examination table, while keeping their head tilted downwards. Maintain the 90-degree head turn throughout this rapid movement. Hold this position for another 30 seconds, continuing to observe for any nystagmus.
The rapid transition is vital for effectively dislodging the otoconia. Explain the maneuver clearly to the patient beforehand to reduce apprehension.
Post-maneuver instructions should be reinforced: avoid bending, stooping, or lying flat for at least 24-48 hours. This allows the crystals to settle in the utricle, minimizing the chance of recurrent vertigo. Monitor the patient closely for any adverse reactions during and after this step.
Step 4: Rotating to the Contralateral Side
Maintaining the head tilt, swiftly rotate the patient’s head 180 degrees to the opposite side, keeping their shoulders still supported on the table. This places the affected ear upwards. Hold this position for another 30 seconds, diligently observing for any recurrence of nystagmus. The goal is to allow the dislodged otoconia to migrate into the common canal.
Emphasize to the patient the importance of remaining calm and still during this rotation. Post-maneuver care is crucial; advise them to avoid head movements that could re-trigger symptoms.
Reinforce the 24-48 hour restriction on bending, lying flat, and rapid head motions. Any persistent or worsening symptoms should prompt immediate medical re-evaluation.
Step 5: Sitting Upright
Slowly and carefully assist the patient to sit upright, encouraging them to remain still for a few minutes to allow for symptom stabilization. Observe for any immediate recurrence of vertigo or nystagmus as they transition to the seated position. This final step completes the maneuver, aiming to settle the repositioned otoconia.
Post-maneuver instructions are paramount. Reiterate the need to avoid bending over, lying flat, or making quick head movements for at least 24-48 hours. Explain that these restrictions minimize the chance of the crystals returning to the posterior canal.
Advise patients to report any persistent or worsening symptoms, or the development of new symptoms, to their healthcare provider promptly.
Post-Maneuver Instructions & Considerations
After the Epley maneuver, patients should avoid head movements and lying flat for 24-48 hours, allowing otoconia to settle and minimizing symptom recurrence.
Immediately After the Epley Maneuver
Directly following the completion of the Epley maneuver, it’s common to experience a brief period of dizziness or nausea. This is a normal response as the displaced otoconia (calcium carbonate crystals) are repositioning within the inner ear. Patients should be closely monitored for a few minutes to ensure their symptoms don’t worsen significantly.
It’s generally recommended that patients remain seated upright for at least 20-30 minutes post-maneuver. This helps to encourage the crystals to settle in the utricle, where they won’t cause vertigo. Avoid any sudden head movements during this time. Some individuals may feel a temporary increase in dizziness, but this usually subsides quickly.
Healthcare professionals should reassure patients that these immediate post-maneuver sensations are typically transient and indicate the maneuver is working. Providing clear instructions about the subsequent 24-48 hour restrictions is also crucial for maximizing the success of the treatment.
Restrictions After the Epley Maneuver
For the initial 24 to 48 hours following the Epley maneuver, specific restrictions are vital to prevent recurrence. Avoid lying flat, including sleeping with your head fully extended, as this can allow the repositioned crystals to migrate back into the posterior semicircular canal.
Refrain from bending over, looking up for extended periods, or making quick head movements. These actions can also dislodge the crystals and trigger a return of vertigo symptoms. When lying down, use extra pillows to maintain a 30-degree head elevation.
Avoid strenuous activities or heavy lifting during this period. It’s also advisable to be cautious while driving or operating machinery. Patients should be informed that adhering to these restrictions significantly increases the likelihood of a successful and lasting outcome from the Epley maneuver, minimizing the chance of symptom return.
Potential Side Effects
While generally safe, the Epley maneuver can cause temporary side effects. The most common is a brief increase in vertigo symptoms immediately after the procedure, as the crystals are being repositioned. This usually subsides within minutes to hours and is a sign the maneuver is working.
Some individuals may experience nausea or vomiting during or shortly after the maneuver. Less frequently, patients report temporary hearing changes, such as a muffled sensation or tinnitus, which typically resolves quickly.
Rarely, the maneuver can lead to discomfort or a feeling of fullness in the ear. It’s important to remember these side effects are usually mild and self-limiting. If symptoms are severe or persist beyond 24 hours, contacting a healthcare professional is recommended to rule out any complications.
When to Seek Further Medical Attention
Although the Epley maneuver is effective, certain situations warrant seeking further medical attention. If your vertigo symptoms worsen or do not improve within 24-48 hours post-procedure, consult your doctor. Persistent nausea, vomiting, or inability to maintain balance also require evaluation.
New neurological symptoms, such as double vision, slurred speech, weakness, or numbness, should be reported immediately as they may indicate a different underlying issue. Any hearing loss or significant ear pain developing after the maneuver needs prompt assessment.
If you experience repeated episodes of BPPV despite multiple successful Epley maneuvers, a thorough re-evaluation is necessary to identify potential alternative causes or complications. Don’t hesitate to seek professional guidance if you have any concerns about your recovery.

Variations of the Epley Maneuver
Modified versions exist for different canal involvement; the standard Epley is for posterior canal BPPV, while adjustments address horizontal canal issues, requiring specialized techniques.
Modified Epley Maneuver
The modified Epley maneuver adapts the original technique for atypical BPPV presentations or patients unable to tolerate the standard procedure fully. This variation often involves adjustments to the head-hanging position’s duration or the degree of head rotation during each step.
Post-maneuver care remains similar, emphasizing restricted head movements for 24-48 hours. Patients should avoid lying flat, bending over, or making rapid head turns to allow the repositioned otoconia to settle correctly.
Monitoring for recurrence is vital, as some individuals may require repeat maneuvers. If symptoms persist or worsen, prompt medical re-evaluation is necessary. Hydration and avoiding strenuous activity immediately following the procedure can also aid recovery. Detailed instructions regarding potential side effects, like temporary nausea, should be provided.

Individualized adjustments are key, guided by the patient’s specific response and tolerance.
Epley Maneuver for Horizontal Canal BPPV
Following the Epley maneuver specifically tailored for horizontal canal BPPV, post-procedure instructions differ slightly from posterior canal BPPV protocols. Patients are generally advised to avoid lying flat on the affected side for at least 24-48 hours, as this can potentially trigger a recurrence of symptoms.
Restrictions on head movements are also crucial. Rapid head turns and bending over should be minimized during the initial recovery period. Maintaining an upright posture as much as possible is recommended to facilitate the settling of repositioned otoconia.
Monitoring for symptom changes is essential. While some temporary dizziness is common, any worsening or new symptoms should be reported to a healthcare professional promptly. Adequate hydration and avoiding strenuous activities can support a smoother recovery.
Individualized guidance is key, considering the patient’s specific response and tolerance to the maneuver.

Diagnosing BPPV Before Performing the Maneuver
Accurate diagnosis is vital; post-maneuver care begins with confirming BPPV through tests like Dix-Hallpike and head impulse, ensuring appropriate treatment strategies;
The Dix-Hallpike Test

The Dix-Hallpike test is a cornerstone in diagnosing posterior canal BPPV, and while not directly related to post-Epley instructions, understanding its principles informs post-treatment assessment. The test involves rapidly moving a seated patient into a supine position with their head turned 45 degrees towards the suspected affected side.
A positive test elicits nystagmus – involuntary eye movements – with a characteristic pattern: latency (a delay before onset), direction (beating towards the affected side initially), and duration. Observing the nystagmus helps pinpoint the affected semicircular canal.
Post-Epley, repeating the Dix-Hallpike test is crucial. Absence of nystagmus suggests successful crystal repositioning. However, some patients may experience transient, diminished nystagmus. Continued monitoring and repeat testing may be necessary to confirm resolution and guide further management if symptoms persist or recur.
Head Impulse Test
The Head Impulse Test (HIT) assesses the vestibulo-ocular reflex (VOR), evaluating whether the eyes can maintain fixation during quick head movements. While primarily used for diagnosing vestibular deficits beyond BPPV, it plays a role in post-Epley assessment, particularly if central compensation is suspected.
A normal VOR results in the eyes moving in opposition to the head turn, maintaining a stable visual field. A positive HIT – corrective saccades following the head impulse – indicates impaired VOR function.
Following the Epley maneuver, a HIT can help identify any residual vestibular dysfunction. Improvement in HIT results suggests restored VOR function. However, it’s important to note that VOR recovery can take time, and a persistently abnormal HIT doesn’t necessarily indicate Epley failure, but rather ongoing vestibular adaptation.

Long-Term Outcomes and Recurrence
Post-Epley, most experience lasting relief, but recurrence rates vary. Adhering to restrictions minimizes crystal migration, enhancing long-term success and reducing future episodes.
Success Rates of the Epley Maneuver
Evaluating the Epley maneuver’s effectiveness requires understanding its generally high success rate, though it isn’t universally guaranteed. Studies indicate a resolution rate of approximately 60-90% after a single maneuver, making it a first-line treatment for posterior canal BPPV. However, immediate symptom relief doesn’t always equate to complete, long-term resolution.
Post-Epley instructions are paramount to maximizing success. Patients must diligently adhere to restrictions – avoiding head movements like bending, lying flat, or turning the head rapidly – for at least 24 to 48 hours. This minimizes the chance of dislodged otoconia (crystals) migrating back into the posterior semicircular canal, triggering a recurrence of vertigo.
If symptoms persist or return despite following instructions, repeat maneuvers may be necessary, often performed by a healthcare professional. Multiple treatments can increase the overall success rate. It’s crucial to remember that individual responses vary, and factors like canal involvement and patient compliance influence outcomes.
Recurrence of BPPV
Despite successful initial treatment with the Epley maneuver, BPPV can unfortunately recur in some individuals. Recurrence rates vary, reported between 15% and 50% within a year, highlighting the importance of diligent post-maneuver care. Understanding why recurrence happens is key to prevention.
Strict adherence to post-Epley instructions is vital. For at least 48 hours, avoid positions that provoke symptoms – no bending over, lying flat, or rapid head turns. Sleeping with the head elevated can also help. These restrictions aim to allow the dislodged crystals to settle in a less symptomatic location.
If symptoms return, prompt medical evaluation is recommended. A repeat Dix-Hallpike test can confirm the diagnosis, and the Epley maneuver can be repeated. In some cases, alternative maneuvers or vestibular rehabilitation therapy may be considered to address persistent or recurrent BPPV.
Preventative Measures
While completely preventing BPPV recurrence isn’t always possible, certain lifestyle adjustments and precautions can minimize the risk. Maintaining good hydration is crucial, as dehydration may contribute to inner ear fluid imbalances. Regular, gentle neck exercises can improve head and neck range of motion, potentially reducing susceptibility.
Be mindful of activities that involve sudden head movements or positions, such as certain yoga poses or gymnastics. If these are unavoidable, perform them slowly and cautiously. Addressing any underlying medical conditions that might contribute to BPPV, like vitamin D deficiency, is also beneficial.
Following the initial post-Epley restrictions – avoiding bending, lying flat, and rapid head turns for 48 hours – remains paramount. If dizziness returns, immediately implement these precautions again and consult a healthcare professional for re-evaluation and potential repeat treatment.